

笔者这几天刚完成《微言(官方版)》的推送功能,今天特分享一下在做的过程中实际解决的问题。如果读者学到了有用的东西,希望能前往App Store下载《微言(官方版)》支持一下笔者,谢谢!🙂
前言
笔者使用的是用的比较广泛的极光推送,还有其他的什么百度推送、友盟推送等其实原理是一样的,至于选择哪个全凭读者喜好。说一下本文将要解决的几个问题:
- APP处于前台运行状态时,提示远程推送消息并保存通知内容;
APP处于后台运行状态时,提示远程推送消息并保存通知内容;
APP处于退出状态时,提示远程推送消息并保存通知内容;
发消息给指定的用户。
##一、证书准备
关于推送证书的配置网上有很多的详细教程,这里不再赘述,推荐一篇比较好的博客-> iOS 推送通知 功能简单实现 。照着里面的步骤完成后,我们得到了这么几个文件:
四个证书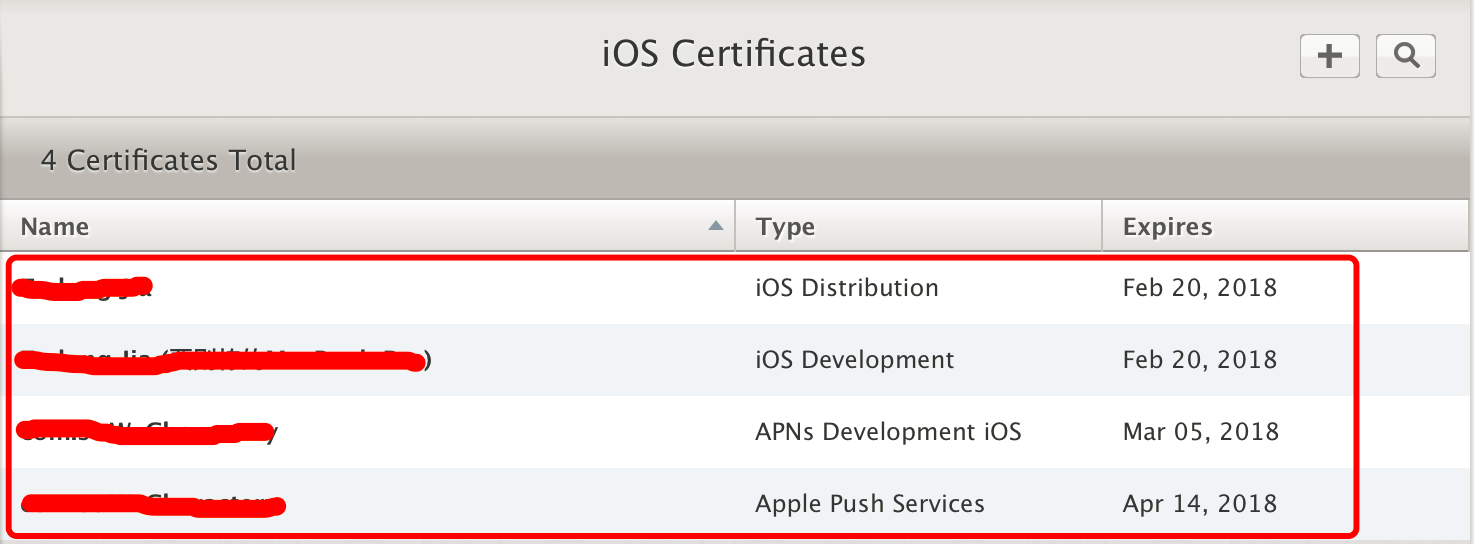
前两个用于xcode的调试与发布
后两个用于极光推送的证书配置
两个配置文件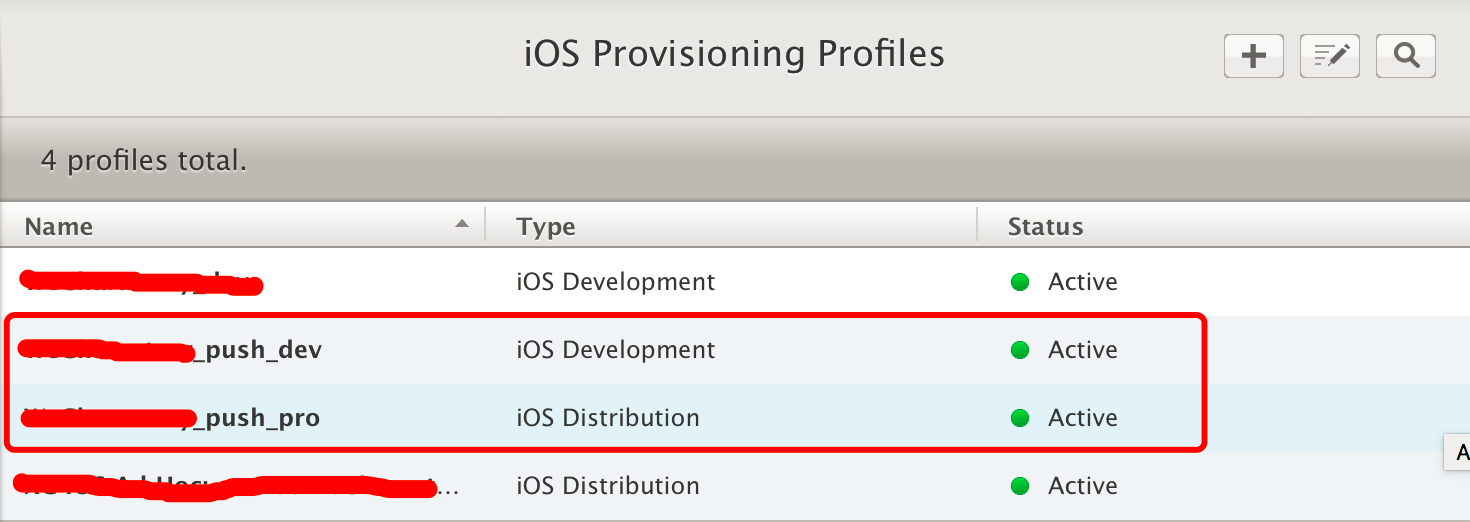
一个带已配置远程推送的APP IDs文件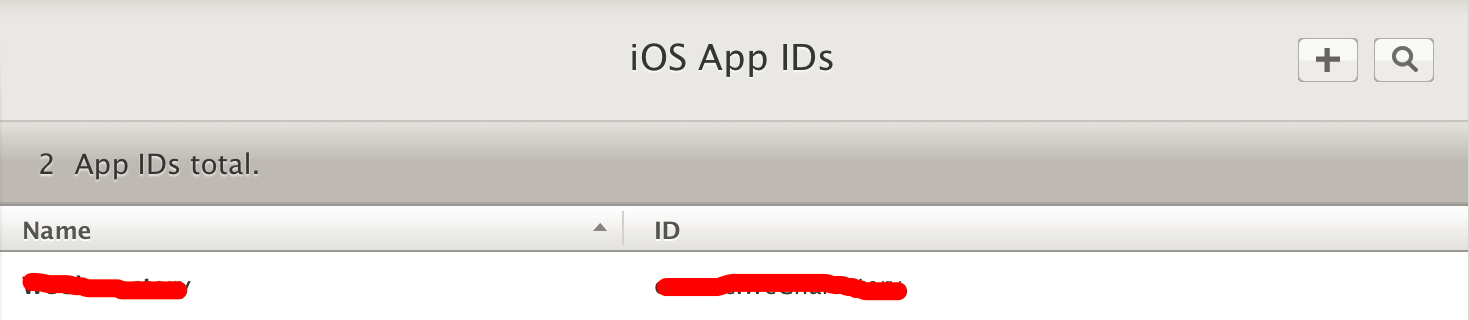
##二、极光推送代码配置
iOS的代码配置笔者推荐最好去极光推送的官网去下载-> Demo 。这里既然说是源码分享,所以贴上笔者的代码,仅供参考:
AppDelegate.h
static NSString *appKey = @"*******************";
static NSString *channel = @"App Store";
static BOOL isProduction = TRUE;
AppDelegate.m
#import "AppDelegate.h"
#import "JKChooseRootVCHelper.h"
#import "JKUtilsHelper.h"
#import "JKRemoteNoticeModel.h"
// 引入JPush功能所需头文件
#import "JPUSHService.h"
// iOS10注册APNs所需头文件
#ifdef NSFoundationVersionNumber_iOS_9_x_Max
#import <UserNotifications/UserNotifications.h>
#endif

- (BOOL)application:(UIApplication *)application didFinishLaunchingWithOptions:(NSDictionary *)launchOptions {
    self.window = [[UIWindow alloc] initWithFrame:[[UIScreen mainScreen] bounds]];
    self.window.backgroundColor = [UIColor whiteColor];

    // 选择根控制器
    [JKChooseRootVCHelper chooseRootViewController:self.window];
    [self.window makeKeyAndVisible];

/******* 极光推送配置 ********/
    // 获取自定义消息
    NSNotificationCenter *defaultCenter = [NSNotificationCenter defaultCenter];

    [defaultCenter addObserver:self selector:@selector(networkDidReceiveMessage:) name:kJPFNetworkDidReceiveMessageNotification object:nil];

    // notice: 3.0.0及以后版本注册可以这样写,也可以继续用之前的注册方式
    JPUSHRegisterEntity * entity = [[JPUSHRegisterEntity alloc] init];
    entity.types = JPAuthorizationOptionAlert|JPAuthorizationOptionBadge|JPAuthorizationOptionSound;

    if ([[UIDevice currentDevice].systemVersion floatValue] >= 8.0) {
        // 点击通知横幅启动app时获取APNS内容(代理方法也可以处理),可以在这里跳转到指定的界面
//        NSDictionary *remoteNotification = [launchOptions objectForKey: UIApplicationLaunchOptionsRemoteNotificationKey];
        //
        NSInteger unReadCount = [[NSUserDefaults standardUserDefaults] integerForKey:kUnReadCount];
        if (unReadCount == 0) {
            [UIApplication sharedApplication].applicationIconBadgeNumber = 0;
        }
    }
    [JPUSHService registerForRemoteNotificationConfig:entity delegate:self];

    // 如不需要使用IDFA,advertisingIdentifier 可为nil
    [JPUSHService setupWithOption:launchOptions appKey:appKey
                          channel:channel
                 apsForProduction:isProduction
            advertisingIdentifier:nil];
/**************************/

    return YES;
}

// 注册APNs成功并上报DeviceToken
- (void)application:(UIApplication *)application
didRegisterForRemoteNotificationsWithDeviceToken:(NSData *)deviceToken {

    [JPUSHService registerDeviceToken:deviceToken];

    JKLog(@"--Device Token: %@", deviceToken);
}

// 实现注册APNs失败接口(可选)
- (void)application:(UIApplication *)application didFailToRegisterForRemoteNotificationsWithError:(NSError *)error {
    //Optional
    JKLog(@"--did Fail To Register For Remote Notifications With Error: %@", error);
}

#pragma mark- JPUSHRegisterDelegate

// 前台收到 APNs 通知后就会走这个方法,iOS 10 Support
- (void)jpushNotificationCenter:(UNUserNotificationCenter *)center willPresentNotification:(UNNotification *)notification withCompletionHandler:(void (^)(NSInteger))completionHandler {
    // Required
    NSDictionary * userInfo = notification.request.content.userInfo;
//    UNNotificationRequest *request = notification.request; // 收到推送的请求
//    UNNotificationContent *content = request.content; // 收到推送的消息内容
//
//    NSNumber *badge = content.badge;  // 推送消息的角标
//    NSString *body = content.body;    // 推送消息体
//    UNNotificationSound *sound = content.sound;  // 推送消息的声音
//    NSString *subtitle = content.subtitle;  // 推送消息的副标题
//    NSString *title = content.title;  // 推送消息的标题

    if([notification.request.trigger isKindOfClass:[UNPushNotificationTrigger class]]) {
        [JPUSHService handleRemoteNotification:userInfo];
        JKLog(@"--iOS10 前台收到远程通知:%@", userInfo);  // [self logDic:userInfo]
    }
    else {
        // 判断为本地通知
//        JKLog(@"--iOS10 前台收到本地通知:{\nbody:%@,\ntitle:%@,\nsubtitle:%@,\nbadge:%@,\nsound:%@,\nuserInfo:%@\n}", body,title,subtitle,badge,sound,userInfo);
    }
    completionHandler(UNNotificationPresentationOptionAlert); // 需要执行这个方法,选择是否提醒用户,有Badge、Sound、Alert三种类型可以选择设置
    // UNNotificationPresentationOptionBadge、UNNotificationPresentationOptionSound、UNNotificationPresentationOptionAlert
}

// 在前台点击通知消息后走该方法(即后台收到通知后,点击通知的回调方法),iOS 10 Support
- (void)jpushNotificationCenter:(UNUserNotificationCenter *)center didReceiveNotificationResponse:(UNNotificationResponse *)response withCompletionHandler:(void (^)())completionHandler {
    // Required
    NSDictionary * userInfo = response.notification.request.content.userInfo;
//    UNNotificationRequest *request = response.notification.request; // 收到推送的请求
//    UNNotificationContent *content = request.content; // 收到推送的消息内容

//    NSNumber *badge = content.badge;  // 推送消息的角标
//    NSString *body = content.body;    // 推送消息体
//    UNNotificationSound *sound = content.sound;  // 推送消息的声音
//    NSString *subtitle = content.subtitle;  // 推送消息的副标题
//    NSString *title = content.title;  // 推送消息的标题

    if([response.notification.request.trigger isKindOfClass:[UNPushNotificationTrigger class]]) {
        [JPUSHService handleRemoteNotification:userInfo];
        JKLog(@"--iOS10 前台收到远程通知:%@", userInfo);  // [self logDic:userInfo]
    }
    else {
        // 判断为本地通知
//        JKLog(@"--iOS10 前台收到本地通知:{\nbody:%@,\ntitle:%@,\nsubtitle:%@,\nbadge:%@,\nsound:%@,\nuserInfo:%@\n}", body,title,subtitle,badge,sound,userInfo);
    }
    completionHandler();  // 系统要求执行这个方法
}
然后还得打开xcode的远程推送设置: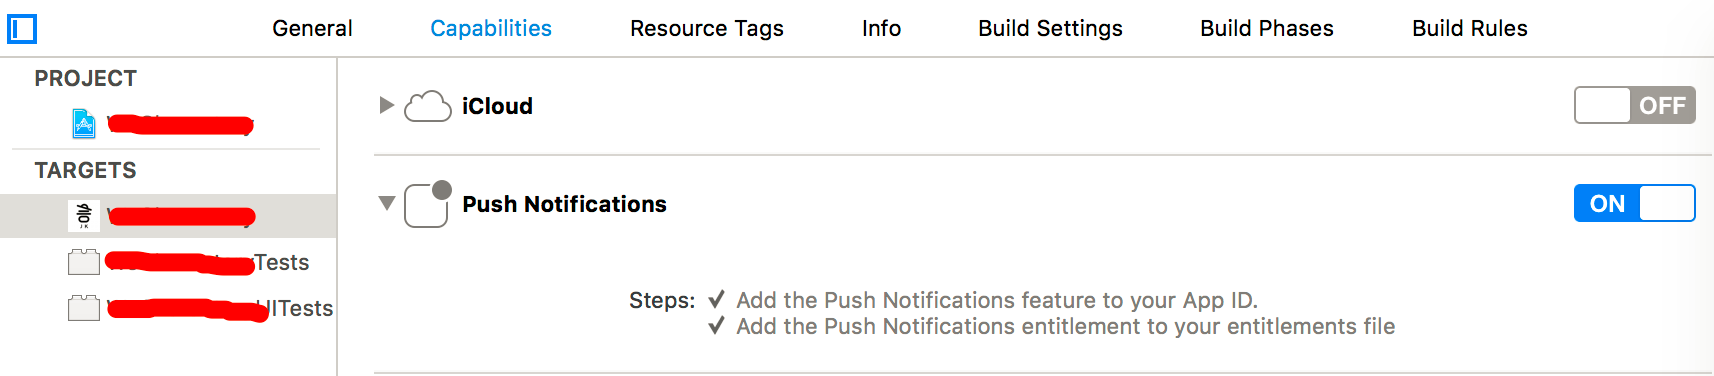
##三、问题解决
1、如何让“APP处于前台运行状态时,提示远程推送消息并保存通知内容”?
其实,完成上面的步骤就已经解决问题1了,现在APP在前端运行时就能收到远程推送通知并能获取通知内容,但是处于后台运行时,APP虽然能提示消息却无法获取通知内容,更别说APP处于退出状态了,所以接下来就解决剩下的两个问题。
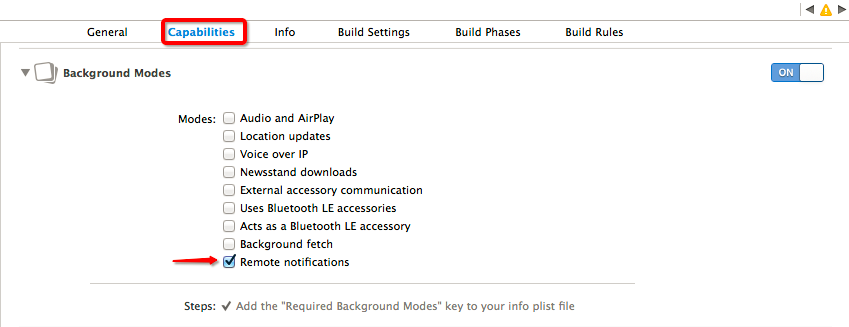
2、如何让“APP处于后台运行状态时,提示远程推送消息并保存通知内容”?
首先我们要明白远程推送通知的几种类型,远程推送通知分为 普通推送/后台推送/静默推送 3 种类型。上面介绍的其实就是普通推送,而后台推送则允许开发者在 App 处于后台的情况下,执行一些代码,我们可以用这种方式来获取通知内容。具体做法如下:
首先在xcode里开启Remote notifications:
在 AppDelegate.m 中处理后台推送通知:
```
// 后台推送处理(void)application:(UIApplication *)application didReceiveRemoteNotification:(NSDictionary *)userInfo fetchCompletionHandler:(void (^)(UIBackgroundFetchResult))completionHandler {
// Required, iOS 7 Support
[JPUSHService handleRemoteNotification:userInfo];JKLog(@"--后台收到远程通知:%@", userInfo);
// 保存通知消息
[[JKDBManagerHelper sharedInstance] insertRemoteNotice:[JKRemoteNoticeModel mj_objectWithKeyValues:userInfo]];completionHandler(UIBackgroundFetchResultNewData);
}发送通知时勾选 content-available 选项:

经过这三步,问题2 就能得到解决了 ^O^
3、如何让“APP处于退出状态时,提示远程推送消息并保存通知内容”?
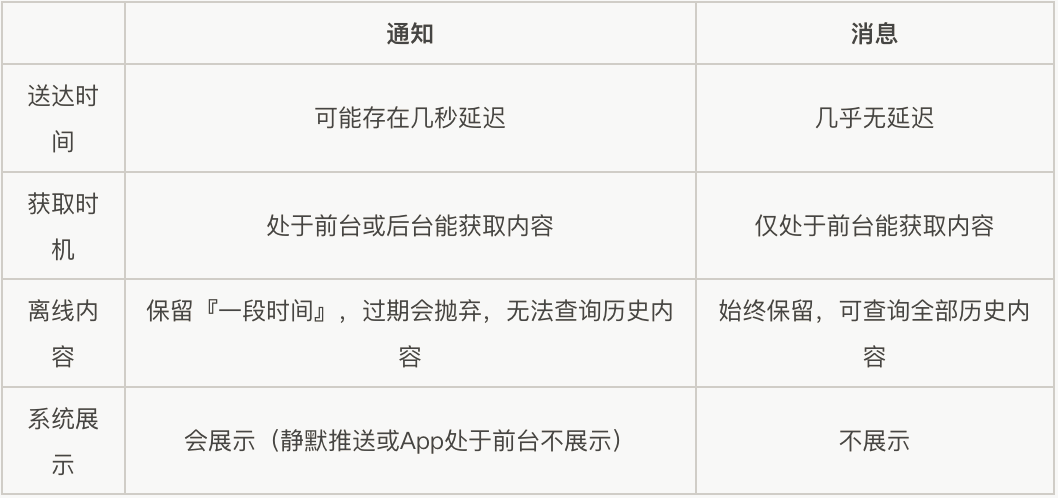
解决这个问题前我们需要了解 应用内消息(即自定义消息 )与推送通知的区别,对比于推送通知,应用内消息:
- 不需要 Apple 推送证书
- 由第三方的服务器下发,而不是 APNs
- 相比通知,更快速,几乎没有延迟,可用于 IM 消息的即时送达
- 能够长时间保留离线消息,可获取所有历史消息内容*
- 通过长连接技术下发消息
- 没有任何展示(横幅、通知中心、角标、声音)
所以,要想在APP处于退出状态时也能获取通知内容,就需要用到应用内消息,具体做法如下:
在 AppDelegate.m 中处理应用内消息:
```
// 获取自定义消息内容
// 自定义消息无需考虑环境和证书问题
// JPush 的应用内消息,会免费保留 5 条离线消息(付费可保留100条)(void)networkDidReceiveMessage:(NSNotification *)notification {
NSDictionary * userInfo = [notification userInfo];
JKLog(@"--收到自定义远程通知:%@", userInfo);NSString *content = [userInfo valueForKey:@"content"];
NSString *title = [userInfo valueForKey:@"title"];NSDictionary *contentDic = [JKUtilsHelper dictionaryWithJsonString:content];
NSDictionary *titleDic = [JKUtilsHelper dictionaryWithJsonString:title];NSDictionary *alertDict = [NSDictionary dictionaryWithObjectsAndKeys:contentDic, @"alert", nil];
NSDictionary *noticeDict = [NSDictionary dictionaryWithObjectsAndKeys:@"", @"jmsgid", alertDict, @"aps", titleDic, @"extra", nil];
JKLog(@"--格式化后的数据:%@", noticeDict);
// 保存通知消息
[[JKDBManagerHelper sharedInstance] insertRemoteNotice:[JKRemoteNoticeModel mj_objectWithKeyValues:noticeDict]];// 改为本地通知提示
// UNUserNotificationCenter *center = [UNUserNotificationCenter currentNotificationCenter];
}
```特别说明:笔者这里将 alert 的 title/subtitle/body 封装到了content 中,附加字段封装到了 title 中。*
需要解决一个重复添加通知内容的问题。因为普通推送、后台推送、自定义消息都能获取通知内容,如果都对接收的通知内容进行保存则会出现重复添加的问题。所以笔者在服务器发出一条远程推送消息时,会附加一个customId(也就是自定义消息ID),如果本地已经保存了某个customId,就不再保存了。
在极光推送网站或自己的服务器发送一条附带customId的消息。
好了,问题3 也顺利解决了 👏
4、如何“发消息给指定的用户”?
这个问题很简单,看极光推送官网的文档里面有说明 标签与别名API(iOS),说下具体步骤。
- 在用户登录和注册成功后的回调里设置标签和别名:
// 设置标签与别名 NSMutableArray *setsArray = [NSMutableArray array]; NSDictionary *userInfo = responseObject[@"result"]; _userId = [NSString stringWithFormat:@"%d", [userInfo[@"id"] intValue]]; if ([userInfo[@"gender"] intValue] == 0) { _gender = @"man"; } else { _gender = @"woman"; } if ([userInfo[@"role_type"] intValue] == 0) { _roleType = @"common"; } else { _roleType = @"special"; } if ([userInfo[@"vip"] intValue] == 1) { [setsArray addObject:@"vip"]; } [setsArray addObject:_gender]; [setsArray addObject:_roleType]; [setsArray addObject:@"iOS"]; NSSet *sets = [NSSet setWithArray:setsArray]; [JPUSHService setTags:sets alias:_userId fetchCompletionHandle:^(int iResCode, NSSet *iTags, NSString *iAlias) { if (iResCode == 0) { JKLog(@"--success to set tags and alias:%@, %@", iTags, iAlias); } else { JKLog(@"--failed to set tags and alias:%d", iResCode); [JKProgressHUDHelper showMessage:@"远程推送设置失败,请重新登录!"]; [JKProgressHUDHelper hideHUDAfterDelay:1.5]; } }]; - 在用户退出的地方清空设置:
[JPUSHService setTags:[NSSet set] alias:@"" fetchCompletionHandle:^(int iResCode, NSSet *iTags, NSString *iAlias) { if (iResCode == 0) { JKLog(@"--success to clear tags and alias:%@, %@", iTags, iAlias); } }]; - 发送消息的时候指定Alias或Tags,就只有指定的用户能收到消息了。
到此,问题4也解决了。指定用户发送消息的功能运用的场景有很多,比如回复评论后提醒对方、指定VIP用户进行推送等等。
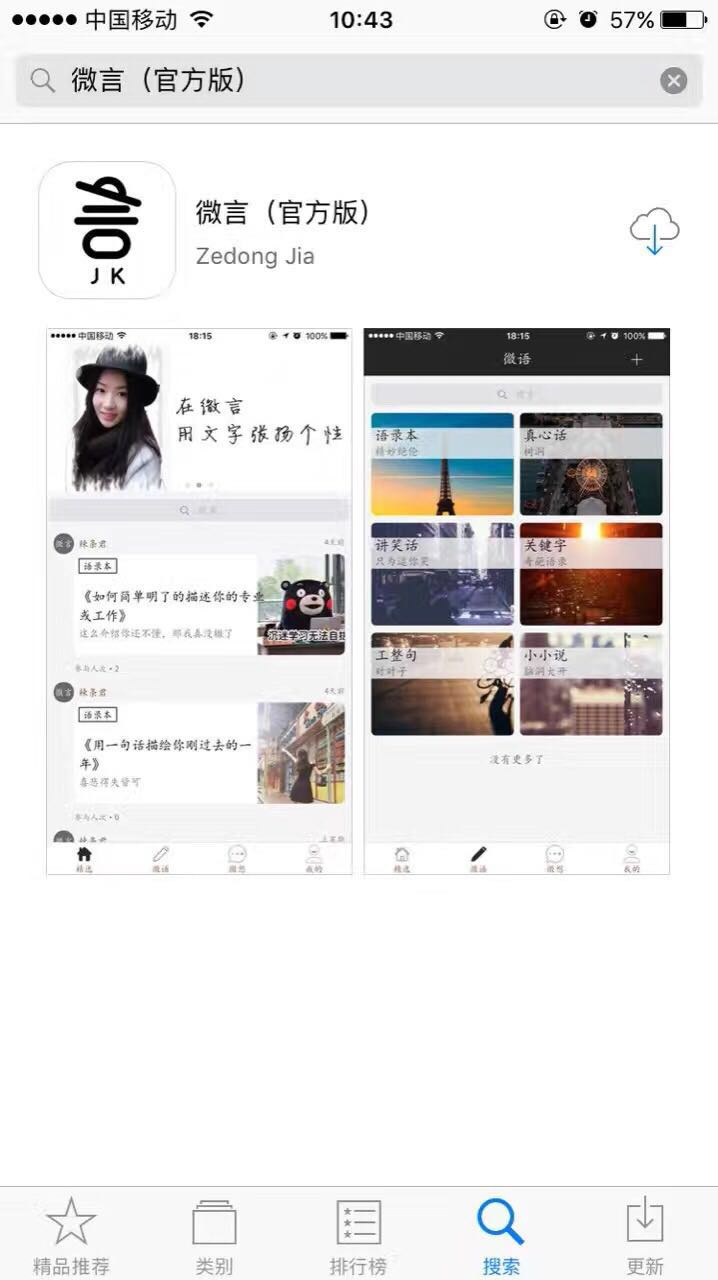
最后附上《微言(官方版)》截图,希望读者多多支持
原作者:微言
原文链接:https://my.oschina.net/Jacedy/blog/863945
扩展:《微言(官方版)》iOS源码分享--自定义弹框篇
0条评论