

分享一篇很赞的文章,爱哥出品,讲的很好,附原文:
如何能让我们的应用能够在系统后台持续地运行是一个自Android从娘(ma)胎(bi)里出来时就议论不停的话题,而且这似乎成了一个牛(liu)逼(mang)应用标配的功能。每当有人问起爱哥这个沉重的问题时我都会选择避而不答,原因有二,一是我并不曾深入地研究过相关功能,二是本人作为一个有情怀的开发者是不提倡让应用去占用没必要且吃紧的系统资源。不过最近一个偶然的机会让我不得不去正视这个问题,那就是在Android中一个应用是否真的能常驻后台呢?这里爱哥可以先给出答案:可以但又不可以。很多朋友看到这里一定会暗骂爱哥“你这特么不是废话么”?先表急,等你看完这篇文章后就知道这句话的真(dou)谛(bi)。
什么才叫后台常驻
大家对应用后台常驻比较普遍的理解是当应用位于后台时不被干掉,退一步说应用位于后台时被干掉后依然能顽强地重新启动起来,这里的被干掉也可以简略地分为两种情况,第一种是当系统资源紧俏的时候or基于某种系统自身的后台运行规则选择干掉你的后台应用来获得更多的资源,第二种是用户手动调用某些安全软件的清理功能干掉你的后台应用。对于Android 5.0以前的系统我们可以考虑以上两种情况下的后台常驻,而对于Android 5.0以及以后的版本我们只能基于第一种情况考虑后台常驻,因为从Android 5.0开始对进程的管理更为严格,啥得也更为暴力。
Android是如何干掉你应用的
要想让应用后台常驻我们还必须先了解一点,那就是Android是如何干掉你的应用的,所谓知己知彼才能百战百胜。上面我们曾提到Android杀应用实质上是杀进程,正常情况下,每一个Android应用启动后都会对应一个进程,我们可以在adb shell中通过ps命令查看:
adb shell
ps|grep aigestudio
上述方法意思是列出条目里含有aigestudio字符的进程:
u0_a68 1202 340 712072 42936 ep_poll f73940c5 S com.aigestudio.daemon可以看到当我们的应用运行后Android会为我们创建一个用户ID为u0_a68进程ID为1202父进程ID为340的进程,当系统资源吃紧或者说用户手动调用某些清理应用时,就会杀掉相应的进程,当然,虽然杀进程这种活对系统来说是一瞬间的事,但是其实质还是按部就班地进行并遵循一定的规则,这里就不得不提到
Android进程的生命周期
与大家比较熟悉的Activity生命周期相比,Android进程的生命周期实质更为简单,越核心的东西越简单嘛,Android将一个进程分为五种不同的状态:
前台进程 Foreground process
处于该状态下的进程表示其当前正在与用户交互,是必须存在的,无论如何系统都不会去干掉一个前台进程除非系统出现错误或者说用户手动杀掉。那么系统是通过怎样的一个规则去判断某个进程是否前台进程呢?下面是一些具体的情景:
- 某个进程持有一个正在与用户交互的Activity并且该Activity正处于resume的状态。
- 某个进程持有一个Service,并且该Service与用户正在交互的Activity绑定。
- 某个进程持有一个Service,并且该Service调用startForeground()方法使之位于前台运行。
- 某个进程持有一个Service,并且该Service正在执行它的某个生命周期回调方法,比如onCreate()、 onStart()或onDestroy()。
- 某个进程持有一个BroadcastReceiver,并且该BroadcastReceiver正在执行其onReceive()方法。
可以看到使进程位于前台的方法还是蛮多的,但是你要知道的事Android是一个碎片化非常严重的系统,很多定制的ROM都会修改一部分系统逻辑来做所谓的优化,所以说上述的情景以及下述我们将要讲到的其它进程状态其实都只能说可以在原生系统上完美生效而如果在一些定制ROM中则有可能无效甚至出现诡异的现象。
可见进程 Visible process
可见进程与前台进程相比要简单得多,首先可见进程不包含任何前台组件,也就是说不会出现上述前台进程的任何情境,其次,可见进程依然会影响用户在屏幕上所能看到的内容,一般来说常见的可见进程情景可以分为两种:
某个进程持有一个Activity且该Activty并非位于前台但仍能被用户所看到,从代码的逻辑上来讲就是调用了onPause()后还没调用onStop()的状态,从视觉效果来讲常见的情况就是当一个Activity弹出一个非全屏的Dialog时。
某个进程持有一个Service并且这个Service和一个可见(或前台)的Activity绑定。
####服务进程 Service process
服务进程要好理解很多,如果某个进程中运行着一个Service且该Service是通过startService()启动也就是说没有与任何Activity绑定且并不属于上述的两种进程状态,那么该进程就是一个服务进程。
后台进程 Background process
这里需要注意的是,我们这儿所说的后台进程只是指的进程的一种状态,与我们前后文提到的“后台进程”是两个概念,切记。当某个进程处于后台进程时,其一般会持有一个不可见的Activity,也就是说当Activity隐藏到后台但未退出时,从代码的逻辑上来讲就是该Activity的onStop被调用但onDestory未被执行的状态,后台进程会被系统存储在一个LRU表中以确保最近使用的进程最后被销毁。
空进程 Empty process
空进程很好理解,当某个进程不包含任何活跃的组件时该进程就会被置为空进程,空进程很容易会被系统盯上而被干掉,但是如果系统资源充足,空进程也可以存活很久。
这五种状态的进程相对于系统来说的重要性从上至下排列,空进程容易被杀死,其次是后台进程,然后是服务进程甚至是可见进程,而前台进程一般则不会被轻易干掉。系统杀进程会遵循一套规则,而这套规则则是建立在系统可用资源的基础上,打个比方,如果我的设备有高达3GB的运行内存且可用的内存还有2GB,那么即便是空进程系统也不会去干掉它,相反如果的设备只有256M的运行内存且可用内存不足16M,这时即便是可见进程也会被系统考虑干掉。这套依据系统资源来杀掉进程的规则Android称之为Low Memory Killer,而且Android在上述五种进程状态的基础上衍生出了更多的进程相关定义,比较重要的两个是进程的Importance等级以及adj值,关于这两个定义大家可以不必深究,但是要有一定的理解,这两个玩意是具体决定了系统在资源吃紧的情况下该杀掉哪些进程。其中Importance等级在ActivityManager.RunningAppProcessInfo中声明:
public static class RunningAppProcessInfo implements Parcelable {
   /**
     * Constant for {@link #importance}: This process is running the
     * foreground UI; that is, it is the thing currently at the top of the screen
     * that the user is interacting with.
     */
    public static final int IMPORTANCE_FOREGROUND = 100;

    /**
     * Constant for {@link #importance}: This process is running a foreground
     * service, for example to perform music playback even while the user is
     * not immediately in the app.  This generally indicates that the process
     * is doing something the user actively cares about.
     */
    public static final int IMPORTANCE_FOREGROUND_SERVICE = 125;

    /**
     * Constant for {@link #importance}: This process is running the foreground
     * UI, but the device is asleep so it is not visible to the user.  This means
     * the user is not really aware of the process, because they can not see or
     * interact with it, but it is quite important because it what they expect to
     * return to once unlocking the device.
     */
    public static final int IMPORTANCE_TOP_SLEEPING = 150;

    /**
     * Constant for {@link #importance}: This process is running something
     * that is actively visible to the user, though not in the immediate
     * foreground.  This may be running a window that is behind the current
     * foreground (so paused and with its state saved, not interacting with
     * the user, but visible to them to some degree); it may also be running
     * other services under the system's control that it inconsiders important.
     */
    public static final int IMPORTANCE_VISIBLE = 200;

    /**
     * Constant for {@link #importance}: This process is not something the user
     * is directly aware of, but is otherwise perceptable to them to some degree.
     */
    public static final int IMPORTANCE_PERCEPTIBLE = 130;

    /**
     * Constant for {@link #importance}: This process is running an
     * application that can not save its state, and thus can't be killed
     * while in the background.
     * @hide
     */
    public static final int IMPORTANCE_CANT_SAVE_STATE = 170;

    /**
     * Constant for {@link #importance}: This process is contains services
     * that should remain running.  These are background services apps have
     * started, not something the user is aware of, so they may be killed by
     * the system relatively freely (though it is generally desired that they
     * stay running as long as they want to).
     */
    public static final int IMPORTANCE_SERVICE = 300;

    /**
     * Constant for {@link #importance}: This process process contains
     * background code that is expendable.
     */
    public static final int IMPORTANCE_BACKGROUND = 400;

    /**
     * Constant for {@link #importance}: This process is empty of any
     * actively running code.
     */
    public static final int IMPORTANCE_EMPTY = 500;

    /**
     * Constant for {@link #importance}: This process does not exist.
     */
    public static final int IMPORTANCE_GONE = 1000;
}
而adj值则在ProcessList中定义:
final class ProcessList {
// OOM adjustments for processes in various states:

// Adjustment used in certain places where we don't know it yet.
// (Generally this is something that is going to be cached, but we
// don't know the exact value in the cached range to assign yet.)
static final int UNKNOWN_ADJ = 16;

// This is a process only hosting activities that are not visible,
// so it can be killed without any disruption.
static final int CACHED_APP_MAX_ADJ = 15;
static final int CACHED_APP_MIN_ADJ = 9;

// The B list of SERVICE_ADJ -- these are the old and decrepit
// services that aren't as shiny and interesting as the ones in the A list.
static final int SERVICE_B_ADJ = 8;

// This is the process of the previous application that the user was in.
// This process is kept above other things, because it is very common to
// switch back to the previous app.  This is important both for recent
// task switch (toggling between the two top recent apps) as well as normal
// UI flow such as clicking on a URI in the e-mail app to view in the browser,
// and then pressing back to return to e-mail.
static final int PREVIOUS_APP_ADJ = 7;

// This is a process holding the home application -- we want to try
// avoiding killing it, even if it would normally be in the background,
// because the user interacts with it so much.
static final int HOME_APP_ADJ = 6;

// This is a process holding an application service -- killing it will not
// have much of an impact as far as the user is concerned.
static final int SERVICE_ADJ = 5;

// This is a process with a heavy-weight application.  It is in the
// background, but we want to try to avoid killing it.  Value set in
// system/rootdir/init.rc on startup.
static final int HEAVY_WEIGHT_APP_ADJ = 4;

// This is a process currently hosting a backup operation.  Killing it
// is not entirely fatal but is generally a bad idea.
static final int BACKUP_APP_ADJ = 3;

// This is a process only hosting components that are perceptible to the
// user, and we really want to avoid killing them, but they are not
// immediately visible. An example is background music playback.
static final int PERCEPTIBLE_APP_ADJ = 2;

// This is a process only hosting activities that are visible to the
// user, so we'd prefer they don't disappear.
static final int VISIBLE_APP_ADJ = 1;

// This is the process running the current foreground app.  We'd really
// rather not kill it!
static final int FOREGROUND_APP_ADJ = 0;

// This is a process that the system or a persistent process has bound to,
// and indicated it is important.
static final int PERSISTENT_SERVICE_ADJ = -11;

// This is a system persistent process, such as telephony.  Definitely
// don't want to kill it, but doing so is not completely fatal.
static final int PERSISTENT_PROC_ADJ = -12;

// The system process runs at the default adjustment.
static final int SYSTEM_ADJ = -16;

// Special code for native processes that are not being managed by the system (so
// don't have an oom adj assigned by the system).
static final int NATIVE_ADJ = -17;
}
Importance等级与adj值在ActivityManagerService中被关联起来,相较于Importance等级而言adj值可以赋予我们更多的参考价值,从上述adj值的定义中我们可以看到,值越小优先级越高,比如native进程的adj值为-17,对于这个adj值的进程来说,系统根本不会动它一分一毫,实质上当进程的adj值去到2时系统就很少会因为其它原因而去杀死它。在平时的开发中,我们可以通过查看节点目录proc下的相关进程来获取其相应的adj值:
adb shell
cat /proc/1728/oom_adj
注意“1728”为进程ID,你可以通过上面我们提到过的ps命令获取相关进程的ID。
cat查看进程的adj值后我们会得到其返回结果“0”,说明当前进程正位于前台,此刻我们再按返回键退出应用后再次查看adj值发现其会变为“8”,也就是说进程优先级变得很低了。这里需要注意的是上述操作均在原生的Android系统上执行,如果是其它的定制ROM则输出及结果可能会有出入,比如在flyme的某些系统版本上位于前台的进程adj为1。因此adj值仅仅能作为一个参考而非绝对的常量。
后台进程常驻的策略与选择
上面说了这么多,其实我们也差不多能总结出一套规律,要想让我们的后台进程长存,我们首先要应付的就是系统的“自杀”机制,而后台进程被杀的首要原因就是我们的进程优先级太低同时系统可用资源太少,其次如果真的被系统干掉,那么我们得重新拉起进程让它重复上次的故事,因此我们的进程后台常驻策略最终可以归结为两点:
轻量化进程
所谓轻量化进程,其实就是迫使我们的进程占用尽量少的资源,但是我们知道的是一个运行中的App就算功能再少也会占用相当一部分资源,因此在这里我们是不应该去想着让我们的应用主进程在后台常驻,让一个没有看不见的界面在后台跑既没意义也没必要,因此大多数情况下我们都会使用一个新的进程去常驻在后台,而这个进程一般会持有一个Service,后台所有的龌龊事都会交由它去处理,毕竟在Android中干这种龌龊事的也只有Service了:
<manifest xmlns:android="http://schemas.android.com/apk/res/android"
    package="com.aigestudio.daemon">

    <application>
        <service
            android:name=".services.DaemonService"
            android:process=":service" />
    </application>
</manifest>
如上所示我们声明一个services并通过startService的方式启动它,在这个Service中我们通过一个死循环来不断Toast一段信息:
package com.aigestudio.daemon.services;

import android.app.Service;
import android.content.Intent;
import android.os.Handler;
import android.os.IBinder;
import android.os.SystemClock;
import android.widget.Toast;

/**
 * @author AigeStudio
 * @since 2016-05-05
 */
public class DaemonService extends Service {
    private static boolean sPower = true;
    private Handler handler = new Handler();

    @Override
    public IBinder onBind(Intent intent) {
        return null;
    }

    @Override
    public int onStartCommand(Intent intent, int flags, int startId) {
        new Thread(new Runnable() {
            @Override
            public void run() {
                while (sPower) {
                    if (System.currentTimeMillis() >= 123456789000000L) {
                        sPower = false;
                    }
                    handler.post(new Runnable() {
                        @Override
                        public void run() {
                            Toast.makeText(DaemonService.this, "AigeStudio" +
                                    System.currentTimeMillis(), Toast.LENGTH_SHORT).show();
                        }
                    });
                    SystemClock.sleep(3000);
                }
            }
        }).start();
        return super.onStartCommand(intent, flags, startId);
    }
}
即便我们不断地弹出Toast,但是因为间隔时间相对来说还算较大,不会使用太多的内存: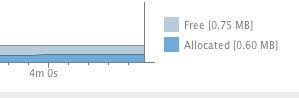
这个时候我们可以考虑来瞅瞅目前两个进程的adj值
AigeStudio:Android AigeStudio$ adb shell
root@vbox86p:/ # ps|grep aigestudio
u0_a61    1631  339   1007512 33976 ffffffff f74aa3b5 S com.aigestudio.daemon
u0_a61    1658  339   1012640 33884 ffffffff f74aa3b5 S com.aigestudio.daemon:service
root@vbox86p:/ # cat /proc/1658/oom_adj
1
root@vbox86p:/ # cat /proc/1631/oom_adj
8
这里至于为什么一个是1一个是8大家动动脑子想想也许就明白了。随着时间的推移进程中的一些对象可能会做缓存导致内存的使用增大,不过只要能被回收就没有什么大碍: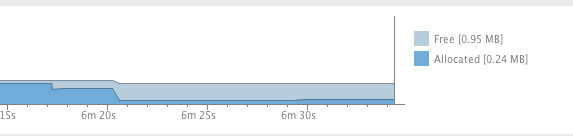
因此,如果你想在进程中的Service里处理更复杂的逻辑,务必尽量多地使用弱引用或软引用,或者说尽量多地去置空一些不必要的引用并在需要的时候再赋值,其次Service本身也提供了onTrimMemory方法来告诉我们系统何时需要释放掉不必要的资源,灵活使用这类方法可以最大程度的让我们的后台Service长盛不衰。还是那句话,尽量让我们的后台进程做更少的事情,及时释放资源,才是硬道理。
被杀后重启
可以这么说,没有任何一个应用进程可以做到永远不被杀死,除非系统给你开了后门,进程被杀并不可怕,可怕的是杀掉后就永远GG思密达了,所以如何使我们的进程可以在被杀后重启呢?这就需要使用到一个叫做守护进程的东西,原理很简单,多开一个进程,让这个进程轮询检查目标进程是否存活,死了的话将其拉起,同时目标进程也需要做一个轮询检查守护进程是否存活,死了的话也将其拉起,相互唤醒一起龌龊。不过即便如此有时候意外也是难免的,在Android中我们还可以通过AlarmManager和系统广播来在一定条件下唤醒逝去的进程。
后台进程常驻的实现
进程提权
我们上面曾说到adj值越小的进程越不容易被杀死,相对普通进程来说能让adj去到0显然是最完美的,可是我们如何才能让一个完全没有可见元素的后台进程拥有前台进程的状态呢?Android给了Service这样一个功能:startForeground,它的作用就像其名字一样,将我们的Service置为前台,不过你需要发送一个Notification:
public class DaemonService extends Service {
    @Override
    public void onCreate() {
        if (Build.VERSION.SDK_INT >= Build.VERSION_CODES.JELLY_BEAN_MR2) {
            Notification.Builder builder = new Notification.Builder(this);
            builder.setSmallIcon(R.mipmap.ic_launcher);
            startForeground(250, builder.build());
        } else {
            startForeground(250, new Notification());
        }
    }
}
值得注意的是在Android 4.3以前我们可以通过构造一个空的Notification,这时通知栏并不会显示我们发送的Notification,但是自从4.3以后谷歌似乎意识到了这个问题,太多流氓应用通过此方法强制让自身悄无声息置为前台,于是从4.3开始谷歌不再允许构造空的Notification,如果你想将应用置为前台那么请发送一个可见的Notification以告知用户你的应用进程依然在后台运行,这么就比较恶心了,本来我的进程是想后台龌龊地运行,这下非要让老子暴露出来,因此我们得想办法将这个Notification给干掉。上面的代码中我们在发送Notification的时候给了其一个唯一ID,那么问题来了,假设我启动另一个Service同时也让其发送一个Notification使自己置为前台,并且这个Notification的标志值也跟上面的一样,然后再把它取消掉再停止掉这个Service的前台显示会怎样呢:
/**
 * @author AigeStudio
 * @since 2016-05-05
 */
public class DaemonService extends Service {
    private static boolean sPower = true;

    @Override
    public void onCreate() {
        if (Build.VERSION.SDK_INT >= Build.VERSION_CODES.JELLY_BEAN_MR2) {
            Notification.Builder builder = new Notification.Builder(this);
            builder.setSmallIcon(R.mipmap.ic_launcher);
            startForeground(250, builder.build());
            startService(new Intent(this, CancelService.class));
        } else {
            startForeground(250, new Notification());
        }
    }

    @Override
    public IBinder onBind(Intent intent) {
        return null;
    }

    @Override
    public int onStartCommand(Intent intent, int flags, int startId) {
        new Thread(new Runnable() {
            @Override
            public void run() {
                while (sPower) {
                    if (System.currentTimeMillis() >= 123456789000000L) {
                        sPower = false;
                    }
                    SystemClock.sleep(3000);
                }
            }
        }).start();
        return super.onStartCommand(intent, flags, startId);
    }
}
/**
* @author AigeStudio
* @since 2016-05-05
*/
public class CancelService extends Service {
@Override
public IBinder onBind(Intent intent) {
return null;
}
@Override
public int onStartCommand(Intent intent, int flags, int startId) {
Notification.Builder builder = new Notification.Builder(this);
builder.setSmallIcon(R.mipmap.ic_launcher);
startForeground(250, builder.build());
new Thread(new Runnable() {
@Override
public void run() {
SystemClock.sleep(1000);
stopForeground(true);
NotificationManager manager =
(NotificationManager) getSystemService(NOTIFICATION_SERVICE);
manager.cancel(250);
stopSelf();
}
}).start();
return super.onStartCommand(intent, flags, startId);
}
}如上代码所示,我们先在DaemonService中发送一个Notification并将其置为前台,而后如果是4.3及其以上的版本的话我们就start另外一个CancelService,这个CancelService的逻辑很简单,发送与DaemonService中ID相同的Notification然后将其取消并取消自己的前台显示,然后停止,大家看到这里可能觉得很奇葩,其实我们就是自导自演装了一次逼。其实就是个小技巧而已,虽然我们通过CancelService干掉了前台显示需要的Notification,但是,请大家查看一下当前进程的adj值,你就会发现,我们DaemonService所在的进程竟然还是可见进程!
AigeStudio:Android AigeStudio$ adb shell
root@vbox86p:/ # ps|grep aigestudio
u0_a61    26788 339   1006480 33824 ffffffff f74aa3b5 S com.aigestudio.daemon
u0_a61    26806 339   994116 24000 ffffffff f74aa3b5 S com.aigestudio.daemon:service
root@vbox86p:/ # cat /proc/26788/oom_adj
8
root@vbox86p:/ # cat /proc/26806/oom_adj
1
是不是很6呢,前段时间就曾有人扒出支付宝曾经以这样的方式让自己的后台进程常驻,但是这个方法有个小小的bug,在一些手机上,发送前台通知会唤醒设备并点亮屏幕,这样会很耗电而且在电量管理界面系统还会统计到你的进程点亮屏幕的次数,不是很好。
除了使Service置为前台显示来提权外,还有很多不是很实用的方式,比如提升优先级和使用persistent权限等:
<manifest xmlns:android="http://schemas.android.com/apk/res/android"
    package="com.aigestudio.daemon">

    <application
        android:persistent="true">
    </application>
</manifest>
死后满血复活
任何一个普通的应用进程都会有被干掉的那么一天,除非你跟系统有关系有契约,说白了就是ROM是定制的且可以给你开特殊权限,不然的话,系统总会在某个时刻因为某些原因把你杀掉,被杀掉不可怕,可怕的是被杀掉后就再也活不过来了……因此,我们得制定各种策略,好让进程能在被杀后可以自启。
Service重启
Android的Service是一个非常特殊的组件,按照官方的说法是用于处理应用一些不可见的后台操作,对于Service我们经常使用,也知道通过在onStartCommand方法中返回不同的值可以告知系统让系统在Service因为资源吃紧被干掉后可以在资源不紧张时重启:
@Override
public int onStartCommand(Intent intent, int flags, int startId) {
    return START_REDELIVER_INTENT;
}
关于onStartCommand方法的返回值,系统一共提供了四个:
START_STICKY
如果Service进程因为系统资源吃紧而被杀掉,则保留Service的状态为起始状态,但不保留传递过来的Intent对象,随后当系统资源不紧张时系统会尝试重新创建Service,由于服务状态为开始状态,所以创建服务后一定会调用onStartCommand方法,如果在此期间没有任何启动命令被传递到Service,那么参数Intent将为null。
START_STICKY_COMPATIBILITY
START_STICKY的兼容版本,不同的是其不保证服务被杀后一定能重启。
START_NOT_STICKY
与START_STICKY恰恰相反,如果返回该值,则在执行完onStartCommand方法后如果Service被杀掉系统将不会重启该服务。
START_REDELIVER_INTENT
同样地该值与START_STICKY不同的是START_STICKY重启后不会再传递之前的Intent,但如果返回该值的话系统会将上次的Intent重新传入。
一般情况下,作为一个后台常驻的Service,个人建议是尽量不要传递Intent进来,避免有时候逻辑不好处理。同时需要注意的是,默认情况下Service的返回值就是START_STICKY或START_STICKY_COMPATIBILITY:
public int onStartCommand(Intent intent, int flags, int startId) {
    onStart(intent, startId);
    return mStartCompatibility ? START_STICKY_COMPATIBILITY : START_STICKY;
}
因此如果没有什么特殊原因,我们也没必要更改。
虽然Service默认情况下是可以被系统重启的,但是在某些情况or某些定制ROM上会因为各种原因而失效,因此我们不能单靠这个返回值来达到进程重启的目的。
进程守护
关于进程守护其实也不是什么高深的技术,其逻辑也很简单,AB两个进程,A进程里面轮询检查B进程是否存活,没存活的话将其拉起,同样B进程里面轮询检查A进程是否存活,没存活的话也将其拉起,而我们的后台逻辑则随便放在某个进程里执行即可,一个简单的例子是使用两个Service:
<manifest xmlns:android="http://schemas.android.com/apk/res/android"
    package="com.aigestudio.daemon">

    <application>
        <service
            android:name=".services.DaemonService"
            android:process=":service" />
        <service
            android:name=".services.ProtectService"
            android:process=":remote" />
    </application>
</manifest>
使用两个进程分别装载两个Service,在两个Service中开轮询,互相唤醒:
/**
 * @author AigeStudio
 * @since 2016-05-05
 */
public class DaemonService extends Service {
    private static boolean sPower = true, isRunning;

    @Override
    public IBinder onBind(Intent intent) {
        return null;
    }

    @Override
    public int onStartCommand(Intent intent, int flags, int startId) {
        if (!isRunning) {
            isRunning = true;
            new Thread(new Runnable() {
                @Override
                public void run() {
                    while (sPower) {
                        if (System.currentTimeMillis() >= 123456789000000L) {
                            sPower = false;
                        }
                        Log.d("AigeStudio", "DaemonService");
                        startService(new Intent(DaemonService.this, ProtectService.class));
                        SystemClock.sleep(3000);
                    }
                }
            }).start();
        }
        return super.onStartCommand(intent, flags, startId);
    }
}
/**
* @author AigeStudio
* @since 2016-05-05
*/
public class ProtectService extends Service {
private static boolean sPower = true, isRunning;
@Override
public IBinder onBind(Intent intent) {
return null;
}
@Override
public int onStartCommand(Intent intent, int flags, int startId) {
if (!isRunning) {
isRunning = true;
new Thread(new Runnable() {
@Override
public void run() {
while (sPower) {
if (System.currentTimeMillis() >= 123456789000000L) {
sPower = false;
}
SystemClock.sleep(1500);
Log.d("AigeStudio", "ProtectService");
startService(new Intent(ProtectService.this, DaemonService.class));
}
}
}).start();
}
return super.onStartCommand(intent, flags, startId);
}
}在原生系统及相当一部分的ROM下上述方法就已经很有用了,即便应用主进程被用户在Recent Task中被清理也无妨上述进程的进行,该方法直至Android 6.0也相当有效,但是对于一些深度定制的ROM就显得很鸡肋,比如魅族、小米。
有些时候,我们会使用一个更为纯净的进程来作为守护进程而非借助Service,你可以使用C层fork,也可以直接Java创建一个新的进程,在5.0以前的版本中,这两种方式创建的进程有一定的区别,不过5.0以后已经变得不再那么重要了,不依赖Android环境的进程唯一的好处是可以做到更轻量,除此之外并无卵用,这里以Java为例,使用Java的方式创建进程有两种途径,一是通过Runtime;二是通过ProcessBuilder,后者提供了更多的选择,因此爱哥一般都会选择后者,使用ProcessBuilder创建进程的过程也很简单,三部曲:构建环境变量、指定用户目录、执行命令:
ProcessBuilder builder = new ProcessBuilder();
Map<String, String> env = builder.environment();
String classpath = env.get("CLASSPATH");
if (null == classpath)
    classpath = context.getPackageCodePath();
else
    classpath = classpath + ":" + context.getPackageCodePath();
env.put("CLASSPATH", classpath);
builder.directory(new File("/"));
try {
    Process process = builder.command("sh").redirectErrorStream(false).start();
    OutputStream os = process.getOutputStream();
    String cmd = "id\n";
    os.write(cmd.getBytes("utf8"));
    os.flush();
    LogUtil.i("Exec cmd " + cmd);
    cmd = "cd " + FILE.getAbsolutePath() + "\n";
    os.write(cmd.getBytes("utf8"));
    os.flush();
    LogUtil.i("Exec cmd " + cmd);
    cmd = "app_process / " + Daemon.class.getName() + " --nice-name=" + PROCESS + " &\n";
    os.write(cmd.getBytes("utf8"));
    os.flush();
    LogUtil.i("Exec cmd " + cmd);
    os.write("exit\n".getBytes("utf8"));
    os.flush();
    LogUtil.i("Exec cmd " + cmd);
} catch (IOException e) {
    LogUtil.e("Exec cmd with error:" + e.toString());
}
启动进程后我们只需要在main方法里轮询检查目标进程或者说目标进程中的Service是否存活即可:
public static void main(String[] args) {
    Looper.prepare();
    new Thread(new Runnable() {
        @Override
        public void run() {
            while (sPower) {
                String cmd = String.format("am startservice%s-n com.aigestudio.daemon/" +
                                "com.aigestudio.daemon.services.DaemonService",
                        SysUtil.isAfter17() ? " --user 0 " : " ");
                LogUtil.i("CMD exec " + cmd);
                try {
                    Runtime.getRuntime().exec(cmd);
                } catch (IOException e) {
                }
                try {
                    Thread.sleep(1500);
                } catch (InterruptedException e) {
                    LogUtil.w("Thread sleep failed:" + e.toString());
                }
            }
        }
    }).start();
    Looper.loop();
    LogUtil.i("====================Daemon exit with error====================");
}
这里我们采用直接调用adb命令的方式启动Service组件,这种方式有种弊端,因为某些奇葩畸形又可能会限制应用对adb的使用甚至不对应用提供,所以为了保险起见我们最好提供第二种以代码启动Service组件的方式:
public static void main(String[] args) {
    Looper.prepare();
    new Thread(new Runnable() {
        @Override
        public void run() {
            while (sPower) {
                String cmd = String.format("am startservice%s-n com.aigestudio.daemon/" +
                                "com.aigestudio.daemon.services.DaemonService",
                        SysUtil.isAfter17() ? " --user 0 " : " ");
                LogUtil.i("CMD exec " + cmd);
                try {
                    Runtime.getRuntime().exec(cmd);
                } catch (IOException e) {
                    LogUtil.w("CMD exec failed:" + e.toString());
                    Intent intent = new Intent();
                    ComponentName component = new ComponentName("com.aigestudio.daemon",
                            DaemonService.class.getName());
                    intent.setComponent(component);
                    IActivityManager am = ActivityManagerNative.getDefault();
                    Method method;
                    try {
                        method = am.getClass().getMethod("startService",
                                IApplicationThread.class, Intent.class, String.class,
                                int.class);
                        Object cn = method.invoke(am, null, intent, intent.getType(), 0);
                        LogUtil.i("start service return: " + cn);
                    } catch (NoSuchMethodException ex) {
                        try {
                            method = am.getClass().getMethod("startService",
                                    IApplicationThread.class, Intent.class, String.class);
                            Object cn = method.invoke(am, null, intent, intent.getType());
                            LogUtil.i("start service return: " + cn);
                        } catch (NoSuchMethodException exc) {
                            LogUtil.i("start service method not found: " + exc);
                        } catch (Exception exc) {
                            LogUtil.e("Start service failed:" + exc.toString());
                        }
                    } catch (Exception ex) {
                        LogUtil.e("Start service failed:" + ex.toString());
                    }
                }
                try {
                    Thread.sleep(1500);
                } catch (InterruptedException e) {
                    LogUtil.w("Thread sleep failed:" + e.toString());
                }
            }
        }
    }).start();
    Looper.loop();
    LogUtil.i("====================Daemon exit with error====================");
}
上述方法中你有可能找不到IActivityManager、ActivityManagerNative和IApplicationThread这三个类,因为在SDK中这几个类是hide的,你需要一个完整的ROM包jar,这个我会另开一篇blog来教大家如何生成完整的jar,好了这里也差不多了,还有一个问题是,每次我们在Service中轮询启动进程时有可能重复启动,所以在此之前我们还应该在启动之前做一次判断进程是否已经被启动,完整代码如下:
package com.aigestudio.daemon.core;

import android.app.ActivityManagerNative;
import android.app.IActivityManager;
import android.app.IApplicationThread;
import android.content.ComponentName;
import android.content.Context;
import android.content.Intent;
import android.os.Environment;
import android.os.Looper;

import com.aigestudio.daemon.services.DaemonService;
import com.aigestudio.daemon.utils.LogUtil;
import com.aigestudio.daemon.utils.SysUtil;

import java.io.BufferedReader;
import java.io.File;
import java.io.FileReader;
import java.io.IOException;
import java.io.OutputStream;
import java.lang.reflect.Method;
import java.util.Map;

public final class Daemon {
    private static final String PROCESS = "com.aigestudio.daemon.process";
    private static boolean sPower = true;
    private static final File FILE =
            new File(new File(Environment.getDataDirectory(), "data"), "com.aigestudio.daemon");

    private Daemon() {
    }

    public static void main(String[] args) {
        Looper.prepare();
        new Thread(new Runnable() {
            @Override
            public void run() {
                while (sPower) {
                    String cmd = String.format("am startservice%s-n com.aigestudio.daemon/" +
                                    "com.aigestudio.daemon.services.DaemonService",
                            SysUtil.isAfter17() ? " --user 0 " : " ");
                    LogUtil.i("CMD exec " + cmd);
                    try {
                        Runtime.getRuntime().exec(cmd);
                    } catch (IOException e) {
                        LogUtil.w("CMD exec failed:" + e.toString());
                        Intent intent = new Intent();
                        ComponentName component = new ComponentName("com.aigestudio.daemon",
                                DaemonService.class.getName());
                        intent.setComponent(component);
                        IActivityManager am = ActivityManagerNative.getDefault();
                        Method method;
                        try {
                            method = am.getClass().getMethod("startService",
                                    IApplicationThread.class, Intent.class, String.class,
                                    int.class);
                            Object cn = method.invoke(am, null, intent, intent.getType(), 0);
                            LogUtil.i("start service return: " + cn);
                        } catch (NoSuchMethodException ex) {
                            try {
                                method = am.getClass().getMethod("startService",
                                        IApplicationThread.class, Intent.class, String.class);
                                Object cn = method.invoke(am, null, intent, intent.getType());
                                LogUtil.i("start service return: " + cn);
                            } catch (NoSuchMethodException exc) {
                                LogUtil.i("start service method not found: " + exc);
                            } catch (Exception exc) {
                                LogUtil.e("Start service failed:" + exc.toString());
                            }
                        } catch (Exception ex) {
                            LogUtil.e("Start service failed:" + ex.toString());
                        }
                    }
                    try {
                        Thread.sleep(1500);
                    } catch (InterruptedException e) {
                        LogUtil.w("Thread sleep failed:" + e.toString());
                    }
                }
            }
        }).start();
        Looper.loop();
        LogUtil.i("====================Daemon exit with error====================");
    }

    public static void start(Context context) {
        LogUtil.i("====================Daemon will be start====================");
        File[] processes = new File("/proc").listFiles();
        for (File file : processes) {
            if (file.isDirectory()) {
                File cmd = new File(file, "cmdline");
                if (!cmd.exists())
                    continue;
                try {
                    BufferedReader br = new BufferedReader(new FileReader(cmd));
                    String line = br.readLine();
                    if (null != line && line.startsWith(PROCESS)) {
                        LogUtil.w("Daemon already running");
                        return;
                    }
                    br.close();
                } catch (IOException e) {
                    LogUtil.e("Check daemon running with error:" + e.toString());
                }
            }
        }
        ProcessBuilder builder = new ProcessBuilder();
        Map<String, String> env = builder.environment();
        String classpath = env.get("CLASSPATH");
        if (null == classpath)
            classpath = context.getPackageCodePath();
        else
            classpath = classpath + ":" + context.getPackageCodePath();
        env.put("CLASSPATH", classpath);
        builder.directory(new File("/"));
        try {
            Process process = builder.command("sh").redirectErrorStream(false).start();
            OutputStream os = process.getOutputStream();
            String cmd = "id\n";
            os.write(cmd.getBytes("utf8"));
            os.flush();
            LogUtil.i("Exec cmd " + cmd);
            cmd = "cd " + FILE.getAbsolutePath() + "\n";
            os.write(cmd.getBytes("utf8"));
            os.flush();
            LogUtil.i("Exec cmd " + cmd);
            cmd = "app_process / " + Daemon.class.getName() + " --nice-name=" + PROCESS + " &\n";
            os.write(cmd.getBytes("utf8"));
            os.flush();
            LogUtil.i("Exec cmd " + cmd);
            os.write("exit\n".getBytes("utf8"));
            os.flush();
            LogUtil.i("Exec cmd " + cmd);
        } catch (IOException e) {
            LogUtil.e("Exec cmd with error:" + e.toString());
        }
    }
}
上述的方式可以在很大程度上在你进程被杀后拉起你的进程,大家需要注意的是,上述代码中我设置的间隔时间分别为3000ms和1500ms,事实上你可以根据具体的业务处理调整该值。进程的被杀总是有个先后顺序,不存在一下子多个进程同时被干掉的情况,除非系统崩溃,所以理论上来说轮询间隔时间越小越容易在双方都被杀死前唤醒对方,但是业务逻辑本身就复杂的话,建议还是不要将该值设置太小,否则对系统来说是一种负担,同时也会使你的进程更容易更频繁地让系统杀死。
Receiver触发
使用Receiver来检测目标进程是否存活不失为一个好方法,静态注册一系列广播,什么开机启动、网络状态变化、时区地区变化、充电状态变化等等等等,这听起来好像很6,而且在大部分手机中都是可行的方案,但是对于深度定制的ROM,是的,又是深度定制,你没有看错,而且代表性人物还是魅族、小米,这两个业界出了名的喜欢“深度定制”系统。
自从Android 3.1开始系统对我们的应用增加了一种叫做STOPPED的状态,什么叫STOPPED?就是安装了之后从未启动过的,大家可能经常在网上看到对开机广播的解释,说要想应用正确接收到开机广播那么就得先启动一下应用,这个说法的技术支持就来源于此,因为自Android 3.1后所有的系统广播都会在Intent添加一个叫做FLAG_EXCLUDE_STOPPED_PACKAGES的标识,说白了就是所有处于STOPPED状态的应用都不可以接收到系统广播,是不是感到很蛋疼菊紧?没事、更蛋疼的还在后面。在原生的系统中,当应用初次启动后就会被标识为非STOPPED状态,而且再也没有机会被打回原形除非重新安装应用,但是,但是,但是,一些深(fang)度(ni)定(gou)制(pi)的ROM按耐不住了,这样的话,如果每个应用都这么搞岂不是后台一大堆进程在跑?所以这些深度定制的ROM会在它们的清理逻辑中,比如小米的长按Home,魅族的Recent Task加入了将应用重置为STOPPED的逻辑,也就是直接或间接地调用ActivityManagerService中的forceStopPackageLocked:
private void forceStopPackageLocked(final String packageName, int uid, String reason) {
    // 省略一行代码……

    Intent intent = new Intent(Intent.ACTION_PACKAGE_RESTARTED,
            Uri.fromParts("package", packageName, null));

    // 省略多行代码……

    broadcastIntentLocked(null, null, intent,
            null, null, 0, null, null, null, AppOpsManager.OP_NONE,
            null, false, false, MY_PID, Process.SYSTEM_UID, UserHandle.getUserId(uid));
}
可以看到上面的代码里发送了一个ACTION_PACKAGE_RESTARTED广播,这个广播会调用broadcastIntentLocked等方法来将相应的应用重置为STOPPED状态,因此一旦我们的应用被重置为STOPPED则再也无法接受到相应的系统广播除非再次启动一下应用清除掉STOPPED标识。
####AlarmManager or JobScheduler循环触发
使用AlarmManage间隔一定的时间来检测并唤醒进程不失为一个好方法,虽然说从Android 4.4和小米的某些版本开始AlarmManage已经变得不再准确但是对我们拉活进程来说并不需要太精确的时间,对于4.4以前的版本,我们只需通过AlarmManage的setRepeating方法即可达到目的:
PendingIntent intent = PendingIntent.getService(this, 0x123,
        new Intent(this, DaemonService.class), PendingIntent.FLAG_UPDATE_CURRENT);
AlarmManager am = (AlarmManager) getSystemService(ALARM_SERVICE);
am.setRepeating(AlarmManager.ELAPSED_REALTIME_WAKEUP, AlarmManager.INTERVAL_HALF_HOUR,
        AlarmManager.INTERVAL_HALF_HOUR, intent);
而对于4.4及其以上的版本来说如果我们想精确的方式重复启动的话,就得使用一点小手段,在4.4及其以上的版本中Android提供给我们一个新的API:setExact,顾名思义就是精确启动,但是与之前版本不同的是,4.4开始并不能精确地重复启动,也就是不能像setRepeating那样,setExact只能被唤醒一次,那么该如何做到重复精确呢?其实很简单,我们每次通过AlarmManager唤醒时都发送一个广播,在这个广播里我们处理一些必要的逻辑,尔后又设置一次AlarmManager,如此往复循环,实质就是对广播做一个递归以达到目的:
/**
 * @author AigeStudio
 * @since 2016-05-05
 */
public class DReceiver extends BroadcastReceiver {
    private PendingIntent mPendingIntent;
    private AlarmManager am;

    @Override
    public void onReceive(Context context, Intent intent) {
        if (null == intent) return;
        if (null == mPendingIntent) {
            Intent i = new Intent(context, DReceiver.class);
            i.putExtra("time", System.currentTimeMillis() + 3000);
            mPendingIntent = PendingIntent.getService(context, 0x123, i,
                    PendingIntent.FLAG_UPDATE_CURRENT);
        }
        if (null == am)
            am = (AlarmManager) context.getSystemService(Context.ALARM_SERVICE);
        long time = intent.getLongExtra("time", System.currentTimeMillis());
        am.setExact(AlarmManager.ELAPSED_REALTIME_WAKEUP, time, mPendingIntent);
    }
}
上述代码中我们使用Intent来传递数据,事实上我们应该使用持久化的数据来存储这个time值,尽量少用甚至不用Intent。
看到这里很多朋友会问是不是OK了啊?很遗憾地告诉你NO!为什么呢?不知道大家是否在开发的过程中遇到这样的问题,你设置的Alarm在应用退出后发现过不了多久居然就没了,特别是在某些深度定制的系统上,上面我们曾提到Receiver如果应用被置为STOPPED状态就再也无法接收到广播,很不幸地告诉你AlarmManager也一样,在AlarmManagerService中有一个BroadcastReceiver,这个BroadcastReceiver会接收上面我们曾说的ACTION_PACKAGE_RESTARTED广播:
class UninstallReceiver extends BroadcastReceiver {
    public UninstallReceiver() {
        IntentFilter filter = new IntentFilter();
        filter.addAction(Intent.ACTION_PACKAGE_REMOVED);
        filter.addAction(Intent.ACTION_PACKAGE_RESTARTED);
        filter.addAction(Intent.ACTION_QUERY_PACKAGE_RESTART);
        filter.addDataScheme("package");
        getContext().registerReceiver(this, filter);

        // 省去几行代码……
    }

    @Override
    public void onReceive(Context context, Intent intent) {
        synchronized (mLock) {
            String action = intent.getAction();
            String pkgList[] = null;
            if (Intent.ACTION_QUERY_PACKAGE_RESTART.equals(action)) {
                // 省去几行代码……

            } else if (Intent.ACTION_EXTERNAL_APPLICATIONS_UNAVAILABLE.equals(action)) {
                pkgList = intent.getStringArrayExtra(Intent.EXTRA_CHANGED_PACKAGE_LIST);
            } else if (Intent.ACTION_USER_STOPPED.equals(action)) {
                // 省去几行代码……

            } else if (Intent.ACTION_UID_REMOVED.equals(action)) {
                // 省去几行代码……

            } else {
                // 省去几行代码……

                Uri data = intent.getData();
                if (data != null) {
                    String pkg = data.getSchemeSpecificPart();
                    if (pkg != null) {
                        pkgList = new String[]{pkg};
                    }
                }
            }
            if (pkgList != null && (pkgList.length > 0)) {
                for (String pkg : pkgList) {
                    removeLocked(pkg);

                    // 省去几行代码……
                }
            }
        }
    }
}
从上述的源码来看当该广播接收者收到ACTION_PACKAGE_RESTARTED广播时会执行removeLocked这个方法,这个方法就像它的名字那样会移除掉与应用相关的Alarm并刷新Alarm的状态:
void removeLocked(String packageName) {
    boolean didRemove = false;
    for (int i = mAlarmBatches.size() - 1; i >= 0; i--) {
        Batch b = mAlarmBatches.get(i);
        didRemove |= b.remove(packageName);
        if (b.size() == 0) {
            mAlarmBatches.remove(i);
        }
    }
    for (int i = mPendingWhileIdleAlarms.size() - 1; i >= 0; i--) {
        if (mPendingWhileIdleAlarms.get(i).operation.getTargetPackage().equals(packageName)) {
            mPendingWhileIdleAlarms.remove(i);
        }
    }
    if (didRemove) {
        rebatchAllAlarmsLocked(true);
        rescheduleKernelAlarmsLocked();
        updateNextAlarmClockLocked();
    }
}
因此,对于某些手机可以在清理应用时将其置为STOPPED状态而言,即便设置AlarmManager也是没卵用的。
与AlarmManager类似的在5.0新鲜出炉的JobScheduler相较而言要比AlarmManager好一些,鉴于两者使用原理类似,这里就不再逼逼了。
与系统Service捆绑
Android系统提供给我们一系列的Service,注意这里我们所指的系统Service并非“SystemService”提供的那些玩意,而是类似于系统广播的便于我们使用的Service,常见常用的就是IntentService,当然还有其它更多更不常用的系统Service,那么为什么爱哥要在这里提到这玩意呢?因为某些系统Service一旦绑定就像拥有开了挂一样的权限,这在大部分机型包括某些深度定制系统上简直就像BUG般存在,以最BUG的NotificationListenerService为例,大家可能很少会用到这玩意,这玩意是用来读取通知的,也就是说只要是通知不管你谁发的,NotificationListenerService都可以检测到,使用它也很简单,和IntentService一样定义一个类继承一下即可:
package com.aigestudio.daemon.core;

import android.service.notification.NotificationListenerService;
import android.service.notification.StatusBarNotification;

/**
 * @author AigeStudio
 * @since 2016-05-05
 */
public class DService extends NotificationListenerService {
    @Override
    public void onNotificationPosted(StatusBarNotification sbn) {
    }

    @Override
    public void onNotificationRemoved(StatusBarNotification sbn) {
    }
}
里面什么逻辑都不用实现,是的你没听错,什么逻辑都不需要,然后在AndroidManifest中声明权限:
<manifest xmlns:android="http://schemas.android.com/apk/res/android"
    package="com.aigestudio.daemon">

    <application>
        <service
            android:name=".core.DService"
            android:permission="android.permission.BIND_NOTIFICATION_LISTENER_SERVICE"
            android:process=":service">
            <intent-filter>
                <action android:name="android.service.notification.NotificationListenerService" />
            </intent-filter>
        </service>
    </application>
</manifest>
这里为了区别主进程,我将该Service置于一个单独的进程中,然后启动应用,注意,这里我们的应用什么逻辑都没有,剔除掉上面所做的所有有关进程保护的逻辑,运行之后你发现看不到你NotificationListenerService所在的进程:
AigeStudio:Android AigeStudio$ adb shell
root@vbox86p:/ # ps|grep aigestudio
u0_a61    9513  339   1002012 30452 ffffffff f74aa3b5 S com.aigestudio.daemon
先别急,NotificationListenerService是个特殊的系统Service,需要非常特别的权限,需要你手动在“设置-提示音和通知-通知使用权限”中打开,注意这个“通知使用权限”选项,如果你设备里没有需要使用通知使用权限换句话说就是没有含有NotificationListenerService的应用的话,这个设置选项是不可见的:
这时我们勾选我们的应用,会弹出一个提示框: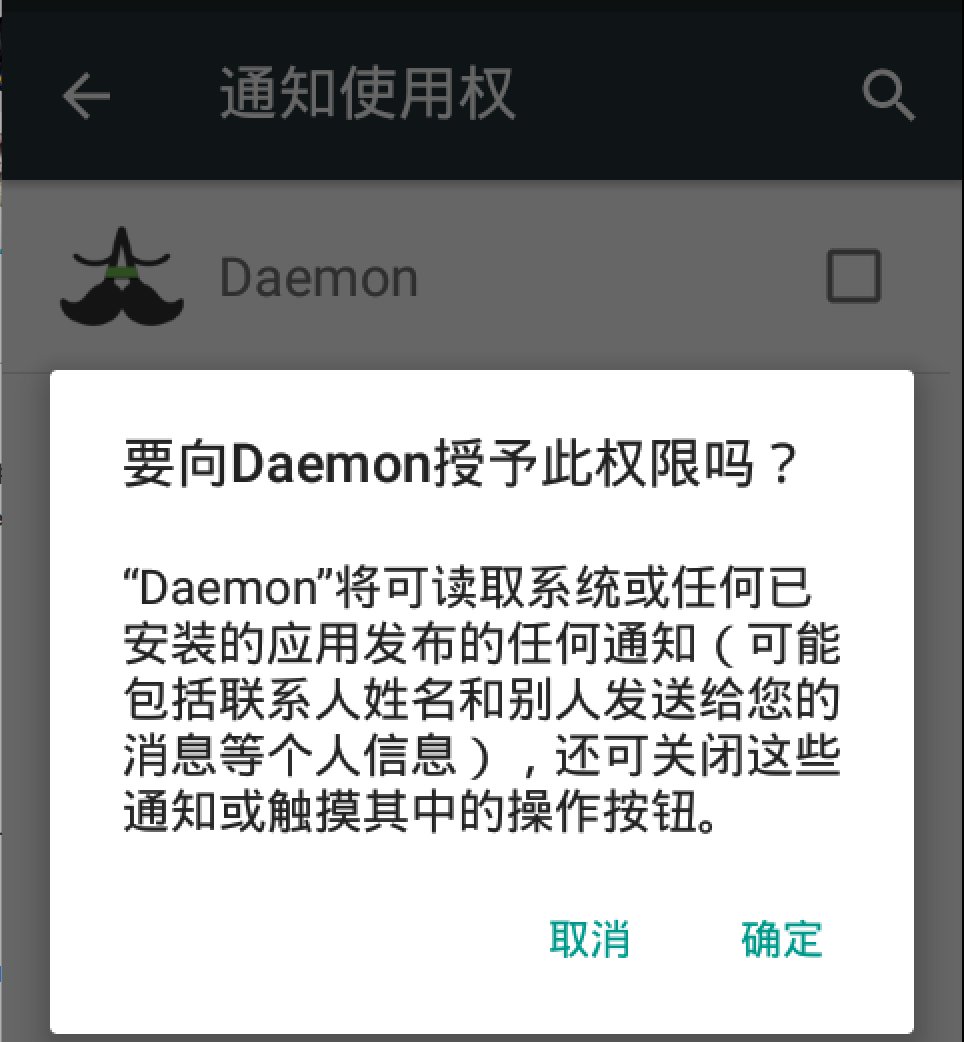
所以,你想好如何骗你的用户勾选这个勾勾了么,一旦勾上,一发不可收拾,这时你就会看到我们的进程启动起来了:
root@vbox86p:/ # ps|grep aigestudio
u0_a61    9513  339   1003044 30532 ffffffff f74aa3b5 S com.aigestudio.daemon
u0_a61    12869 339   993080 23792 ffffffff f74aa3b5 S com.aigestudio.daemon:service
好了,这时候,见证奇迹的时候来了,不管是某米、某族还是某某,请尝试下它们的一键清理,你会发现不管怎么杀,我们的进程都还在,除了一小部分名不经传的手机因为修改系统逻辑将其杀死外,绝大部分手机都不会杀掉该进程,为什么呢?好事的朋友一定会去check该进程的adj值:
root@vbox86p:/ # ps|grep aigestudio
u0_a61    12869 339   993080 23792 ffffffff f74aa3b5 S com.aigestudio.daemon:service
root@vbox86p:/ # cat /proc/12869/oom_adj
0
你会发现我们的进程被置为前台进程了,而且不仅仅是这样哦,即便你重启设备开机,它也会首先被启动,因为其内部逻辑会使其在系统启动时绑定并开始监听通知,当然我们这里并没有任何关于通知的逻辑,那么你可能会问爱哥这又有什么用呢?我们又不能在NotificationListenerService里处理与通知不相关的逻辑,没错,是这样,但是我们也没必要啊,我们只需新建一个Service并使其与NotificationListenerService在同一进程下,那么我们的这个Sefvice不就一样不死了吗:
<manifest xmlns:android="http://schemas.android.com/apk/res/android"
    package="com.aigestudio.daemon">

    <application>
        <service
            android:name=".services.DaemonService"
            android:process=":service" />
        <service
            android:name=".core.DService"
            android:permission="android.permission.BIND_NOTIFICATION_LISTENER_SERVICE"
            android:process=":service">
            <intent-filter>
                <action android:name="android.service.notification.NotificationListenerService" />
            </intent-filter>
        </service>
    </application>
</manifest>
这种方式唯一的一个缺点就是你需要欺骗用户手动去开启通知权限,需要给用户一个合理的理由,所以对于跟通知权限根本不沾边的应用想想还是算了吧。
与NotificationListenerService有点相像的是5.0新推出的与JobScheduler相关的JobService,不过其BUG程度远不及NotificationListenerService,这里不再多说了,大家感兴趣的话可以去试试。关于NotificationListenerService我有太多话想说,爱哥发现在5.0及以上的系统上它内部逻辑很奇特,与其它的系统Service有很大的区别,而且网上很少关于它的介绍,即便有也是很老旧的源码上分析的,有空爱哥单独开一篇文章来好好捋捋它。
so注入系统进程
这种方式去做进程常驻需要获得root权限,而且不容易控制,爱哥尝试了多种不同的方法去注入提权,都不稳定,不过曾经有朋友问到爱哥,既然诚心诚意的发问了,爱哥就大发慈悲的回答各位,为了防止系统被破坏,为了保护系统生态的和平,贯彻爱与真实的邪恶,可爱又迷人的正义使者爱哥犹如穿梭在银河中的火……这种方式还是不教大家了,毕竟技术是把双刃剑。
KFC外带全家桶
以全家桶的方式去相互唤醒相互拉活是目前来说最稳定最安全的方式,各大牛逼点的应用都有类似行为,当然对于很多小应用来说,没有BAT那样的实力,不过你依然可以使用一些第三方的网络服务,比如XX推送,一旦设备上的某应用通过XX的推送获得消息时,是可以间接唤醒其它应用并推送与其相关的消息的。好了,就先扯这么多,敲一晚上我也是累了,该睡了。
让应用常驻后台的意义与权衡
作为一个有情怀的开发者,我们都知道每当用户关闭一个程序时,我们的程序就应该彻底地死去并释放其所占用的系统资源,这个浅显的道理不仅适用于我们移动应用开发,也适用于任何桌面程序的开发,但是相对于一些程序而言,总想在用户关闭程序后还保持一个后台程序来处理一些所谓的“不见得光的任务”,对于一些必要的系统服务而言,这些后台程序是必须的可以理解的,但对于普通的程序来说,保持一个后台程序就显得有点莫名其妙了,举个例子,某文档编辑器总会在关闭后在后台一直保持一个叫“rwcount”的进程,从字面上分析以及实际的测试来看目测是做读写计数统计的,然而我都没有在编辑文档并退出程序了还统计个鸡毛。因此,每当我们想在我们的应用中加入后台进程常驻的功能时,我们是否应该多考虑权衡下是否真的需要后台常驻呢?再举个例子,假如我们开发一款新闻客户端应用,你说你需要让其拥有一个后台常驻的Service,那么这个后台常驻的Service常驻的目的是什么呢?如果是为了Update一些数据or处理一些必要的逻辑,是否可以考虑在相关逻辑处理完毕后就释放掉资源而不必常驻呢?当然爱哥知道有一些应用都有实时上报数据统计的需求,甚至有些应用为了能够让上报的服务存活而想出各式各样的怪招,这个下面会讲,在这里,爱哥很好奇的是对于这些统计数据真的需要实时上报这么BT?当然爱哥知道对于一小撮应用而言,每分钟的统计数据都可能对结果产生很大的影响,但是这部分应用所占比例真的很小很小,小到完全可以忽略不计,而对于其他的一些有所谓的“实时上报”需求的应用,大多数都是闲的蛋疼,爱哥接触过这方面做得最好的应用其实现逻辑是仅会在设备充电且WIFI连接且应用存活的状态下才会做数据上报,为什么我会这么清楚,因为是我写的……而且该应用的日活目前已接近1700W,所以说,当你确定需要应用有进程常驻后台时,一定要三思是否真的需要,还是可以做些变通?不过话说回来要是你不幸遇到那种敲了三两行代码就觉得自己很懂开发网上扒了两张UI图就觉得自己很会设计的上司,爱哥也只能默哀了。
原作者:爱哥
原文链接:http://blog.csdn.net/aigestudio/article/details/51348408
本作品采用知识共享署名-相同方式共享 4.0 国际许可协议进行许可。
转载或引用前请注明来自AigeStudio 侵权必究
关于爱哥
0条评论